Custom Phone Numbers
There are two regimes in which the Phonic Voice Agent can communicate over telephone:
- Outbound Calls: The agent is the caller. The agent initiates calls to other phone numbers from a user-configured phone number.
- Inbound Calls: The agent is the callee. The agent receives calls from anyone at a user-configured phone number.
Phonic provides an easy way to use Phonic’s reserved phone numbers for performing both inbound and outbound calls. This guide is for configuring your own phone number with a SIP trunking provider like Twilio or Telnyx.
We will walk through SIP trunking configuration using Twilio in this demo, but the process should be very similar for other SIP trunking providers.
Outbound
To perform outbound calls, we can simply call the /conversations/sip/outbound_call endpoint with a properly configured phone number. Let’s walk through the configuration steps below.
First, let’s create a SIP trunk and connect it to our phone number. Before starting, make sure you have purchased a phone number on Twilio (see guide here).
-
Navigate to the Trunks page and click “Create a New Trunk”
-
Give it a friendly name. This name is for your identification purposes only.
-
Click on the “Termination” page in the side bar.

-
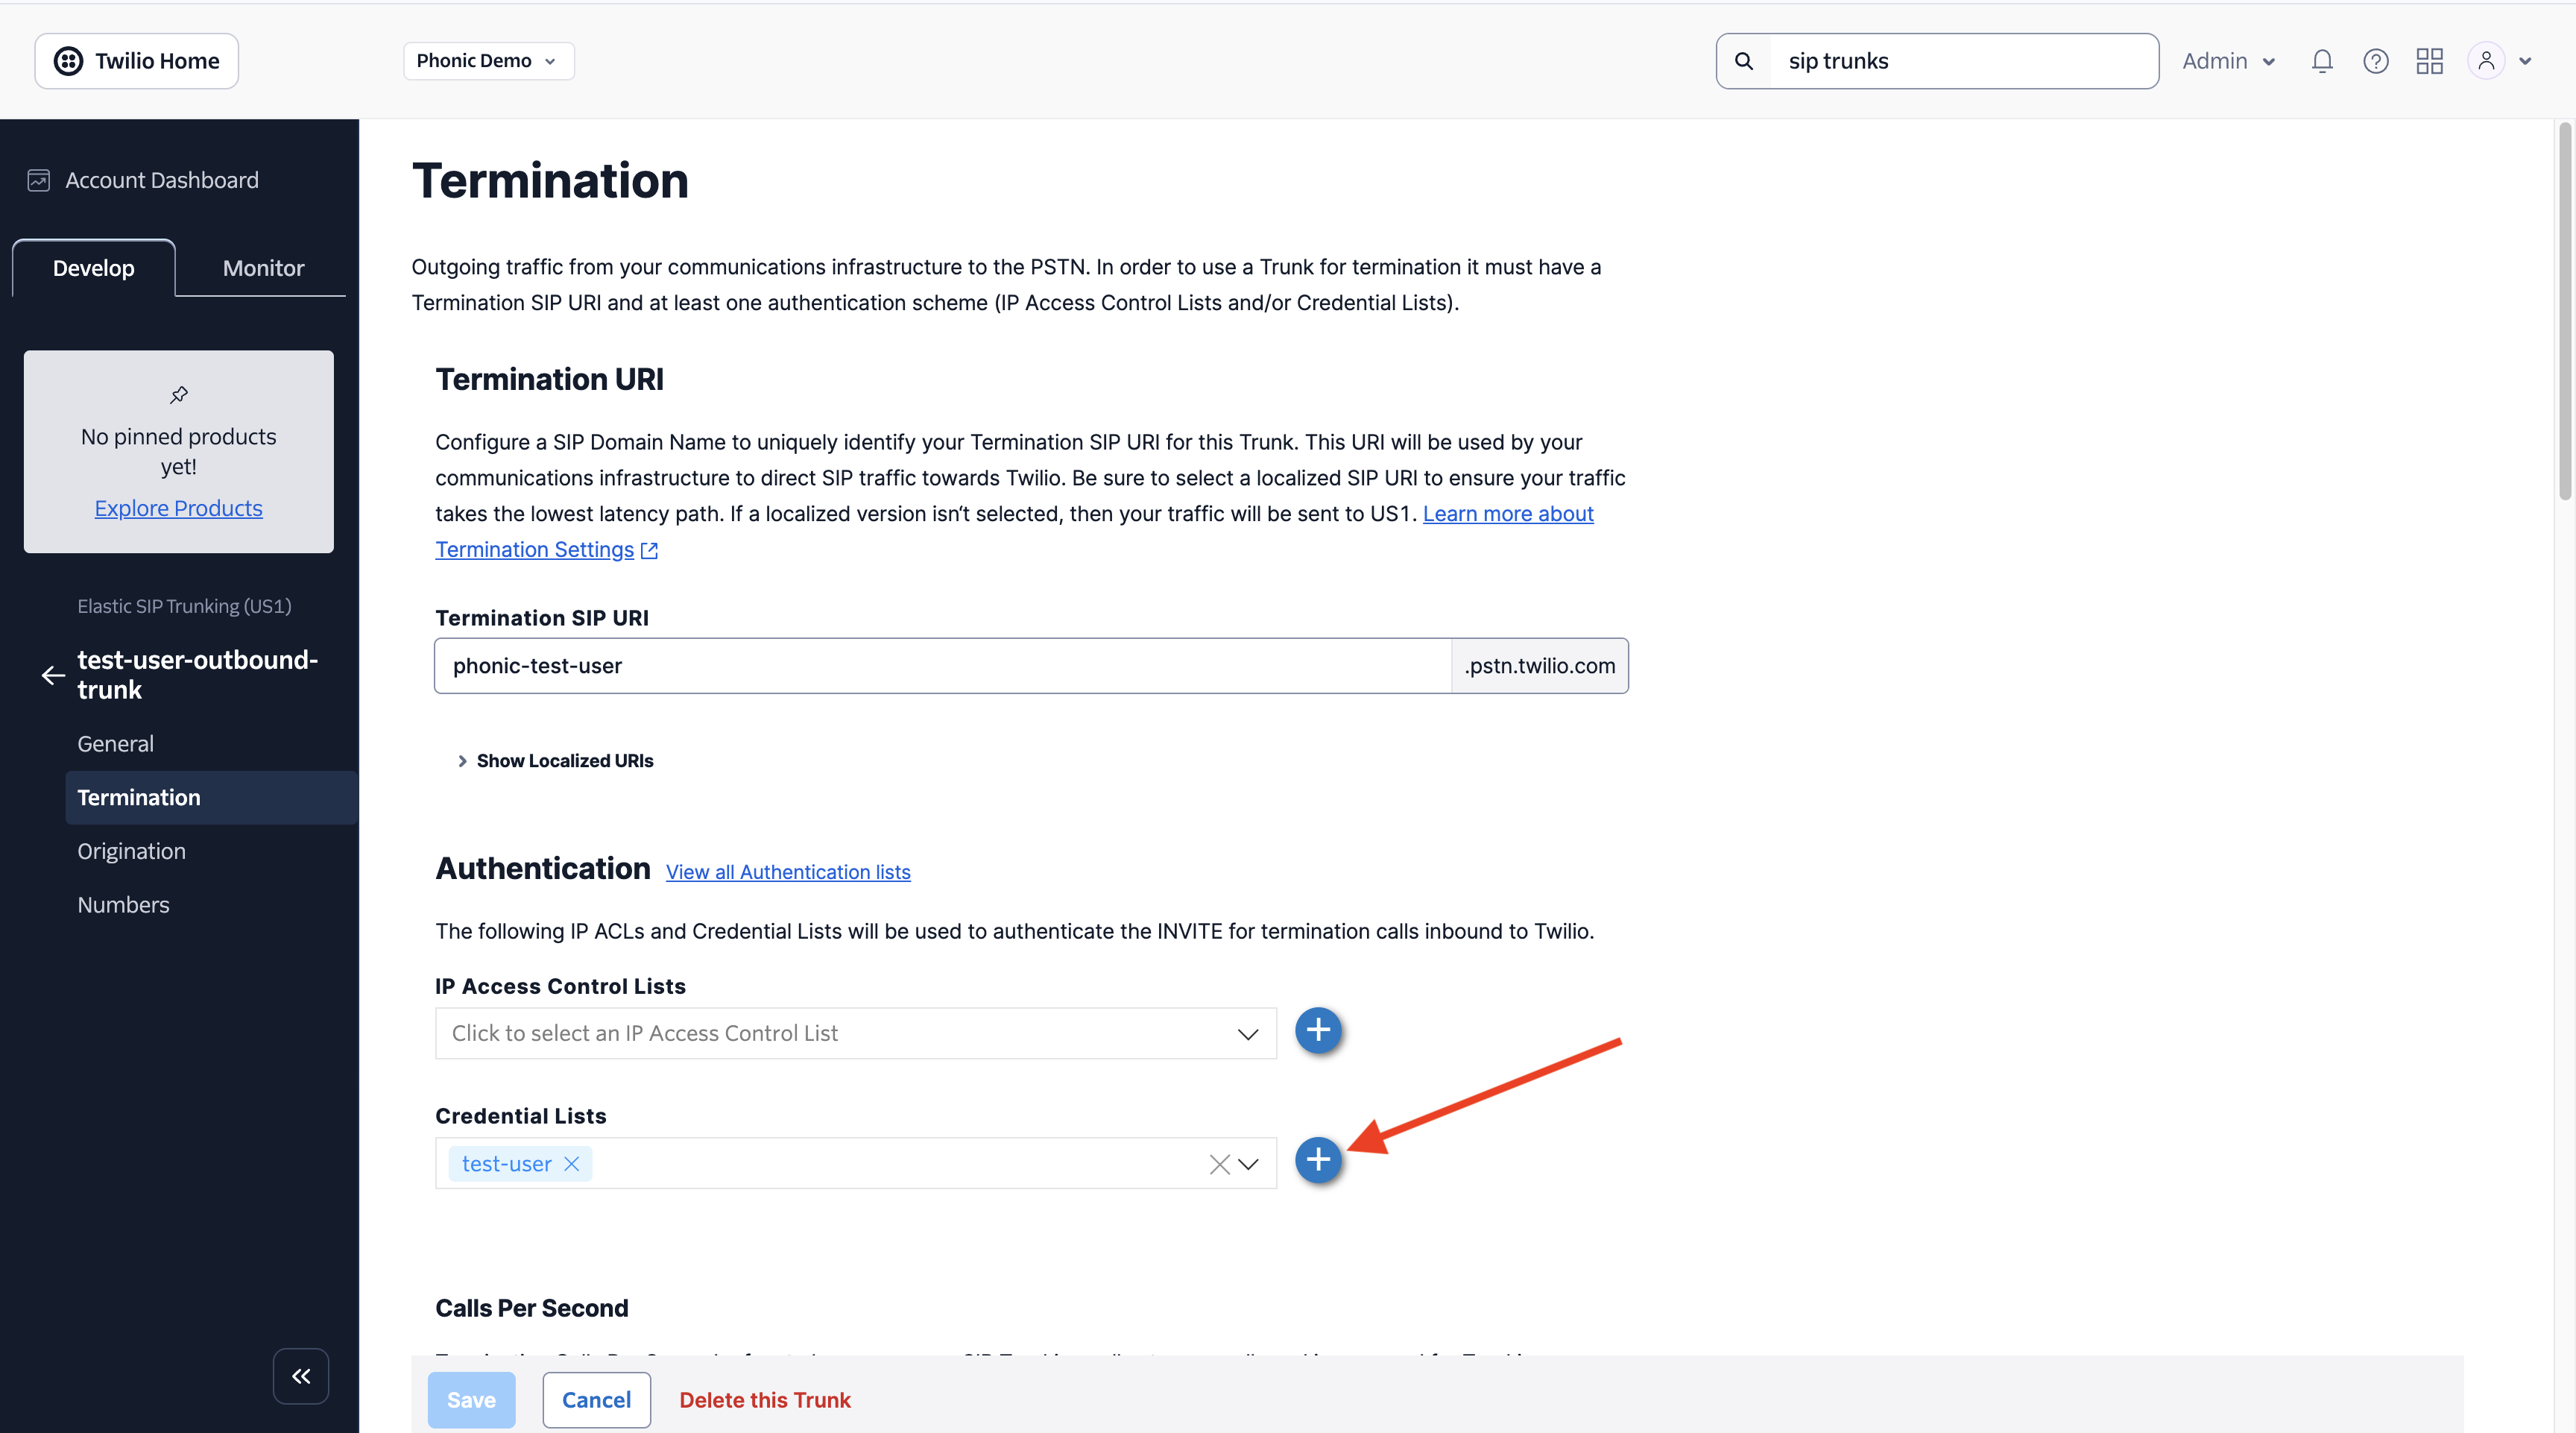
Configure the Termination SIP URI for this trunk. Record this URI somewhere, as it will be needed for initiating outbound calls.
-
Create a new credentials list and add it to the SIP trunk. Record the username and password that you chose, as these will also be needed for initiating outbound calls. This step is technically optional, but it is important for preventing your SIP trunk from being spoofed.

-
Click on the “Numbers” page in the side bar and add your number to the SIP trunk.
For more information on termination settings, refer to Twilio docs here.
Once you have a configured SIP trunk with your phone number, simply use the follow code to initiate the call! Remember to include your Termination URI, Username, and Password in the correct headers for verification. Also, make sure you set your config appropriately!
Inbound
To setup an agent to accept inbound calls, we can simply add one or more properly configured phone numbers to our agent. Let’s walk through the configuration steps below.
First, let’s create a SIP trunk and connect it to our phone number. Before starting, make sure you have purchased a phone number on Twilio (see guide here).
- Navigate to the Trunks page and click “Create a New Trunk”
- Give it a friendly name. This name is for your identification purposes only.
- Click on the “Origination” page in the side bar.
- Set the Origination URI of this SIP Trunk to
sip:2j1rahun317.sip.livekit.cloud - Click on the “Numbers” page in the side bar and add your number to the SIP trunk.
For more information on origination settings, refer to Twilio docs here.
Once you have a configured SIP trunk with your phone numbers, use the Phonic API to create or update an agent with { phone_number: "custom", custom_phone_numbers: [<your_phone_numbers>] }.
The agent will now be able to receive phone calls on any of the configured phone numbers.
You can use the configuration_endpoint agent parameter to customize the agent’s behavior based on the incoming phone number.
Phone Call Transfers
If you intend to use the “transfer to phone number”, make sure to enable SIP REFER headers and PSTN transfers on your SIP Trunk. See this link for configuration on Twilio.